
Using the WYSIWYG Editor
What You See Is What You Get (WYSIWYG)
The WYSIWYG editor is similar to the editor in Microsoft Word or other authoring tools.

Top Menu: Edit Format Insert View Tools
Edit
The edit menu provides undo, redo, cut, copy and past options.

- Undo: Undoes the last thing you have done. Reverse.
- Redo: If you undo and decide you wish you hadn't, you can put the change back.
- Cut: Remove selected items.
- Copy: Copies selected items.
- Paste: Pastes selected items.
- Paste as text: Removes formatting when pasting. Toggle option on and off.
- Select all: Selects all items on page.
Note: When copying from a Word Document or an email, be sure to use the "Paste as text" option. It helps to remove formatting that can cause accessibility issues on web pages.
Format
Select basic options such as bold and italic as well as strikethrough, superscript, and subscript. Also has a useful option of clearing all formatting so you can start fresh.
The Formats option is the same as the Formats option in the middle of the icon bar. See details below.
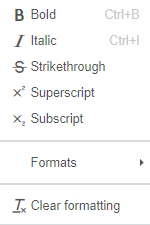
Note: If your content is not doing what you think it should, try the "Clear formatting" option and try again. This can also be used on items that were previously pasted from Microsoft Word or emails to help clear up unwanted formatting.
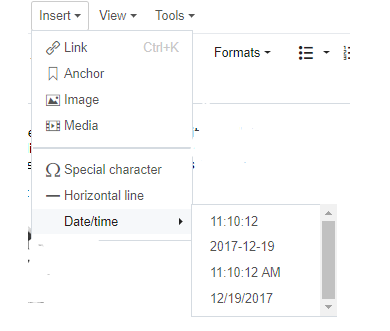
Insert
Allows you to insert a link, anchor, image, or media similar to the icons on the WYSIWYG. It also provides the option to insert special characters, a horizontal line, and current date/time.
View
The show blocks option helps to see how information is grouped together.
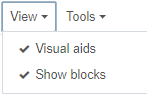
This option helps more with programming than with standard content entry.
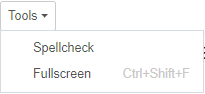
Tools
Offers spellcheck and fullscreen view.
Formats
![]() Selection of formatting options
Selection of formatting options
Headings
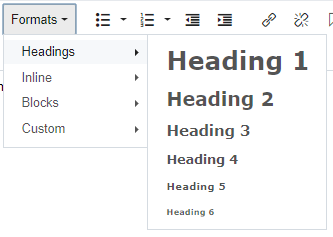
Headings are how digital devices maneuver through a document. It is important to use headings for titles and subtitles of sections within a document.
Headings must be in order in the similar to an Alphanumeric Outline. H1 would be the roman numerals, h2 would be capitalized letters, h3 Arabic numerals, and h4 lowercase letters, etc.
Inline Code
This option is for if you wish to share code on the website and have it be visible. It will not process the information listed. Unless you are sharing how to write code on the website, you will not find this feature useful.
Blocks
The two options here that you will use the most, will be paragraph and blockquote.

Paragraph ensure that the text has the paragraph formatting. If your text is too small, it needs the paragraph formatting. Also, if you realize you set something as a heading and need to return it to paragraph formatting, this is a good method of resetting the text.
Blockquote is for quotes or information you wish to stand out. To undo a blockquote, select the option a second time to remove the formatting.

Div creates a div which requires a class (code that affects appearance) to be added. At this time, there are no classes set to use with divs.
Pre also requires classes that have not yet been created.
Custom
Custom has several selections of classes for images. More than one class may be applied.
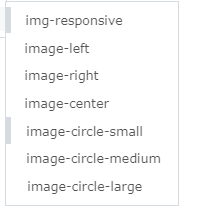
- Img-responsive: This class ensures that an image will resize to work on all devices. Please place this on all images unless there is a specific reason not to. If an image is more than 150px wide, you must apply this class to the image or your page will not work correctly on small-screened devices such as phones.
- Image-left: Image will be on the left side of the page and text will flow to the right.
- Image-right: Image will be on the right side of the page and text will flow to the left.
- Image-center: Image is centered on the page. Text will be above and below the image.
- Image-circle-small: use with square images to make the image into a small circular image. (max-width: 200px)
- Image-circle-medium: use with square images to make the image into a medium circular image (max-width: 350px).
- Image-circle-large: Use with square images to make the image to a large circular image (max-width: 450px)
Common
Undo
![]() Remove the last change made
Remove the last change made
Redo
![]() Apply last change that was just removed
Apply last change that was just removed
Bold
![]() Bolds text. This option is visual only and does not share emphasis with screen readers. So only use when important visually but not important to the context of the content.
Bolds text. This option is visual only and does not share emphasis with screen readers. So only use when important visually but not important to the context of the content.
Italic
![]() Sets text into italic font. This option is visual only and does not share emphasis with screen readers. So only use when important visually but not important to the context of the content.
Sets text into italic font. This option is visual only and does not share emphasis with screen readers. So only use when important visually but not important to the context of the content.
Full Screen
![]() Expands editing screen to full width.
Expands editing screen to full width.
Alignment
Align Left
![]() Text is set so left edge of text is flush with left margin.
Text is set so left edge of text is flush with left margin.
Align Center
![]() Text is set so it is centered between margins
Text is set so it is centered between margins
Align Right
![]() Text is set so right edge of text is flush with right margin.
Text is set so right edge of text is flush with right margin.
Justify
![]() Text is aligned evenly along the left and right margins often creating larger spacing between words.
Text is aligned evenly along the left and right margins often creating larger spacing between words.
Lists
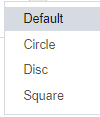
Bullet List
![]() Unordered bullet list for items whose order is not significant.
Unordered bullet list for items whose order is not significant.
The site’s css will override appearance on published site to keep consistency, based upon level of bullet. So selecting an option will not change it from the default.
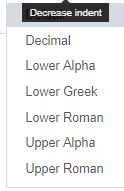
Numbered List
![]() Order list for items whose order is significant.
Order list for items whose order is significant.
The options are available for use as needed.
Indents
Increase Indent
![]() Increases the left indent of the whole paragraph. Cannot move indent beyond the right margin.
Increases the left indent of the whole paragraph. Cannot move indent beyond the right margin.
Decrease Indent
![]() Decreases the left indent of the whole paragraph. Cannot move indent beyond left margin.
Decreases the left indent of the whole paragraph. Cannot move indent beyond left margin.
Links
Insert / Edit Link
![]() Add a hyperlink or edit a hyperlink within a page. Hyperlink may be to a page in the website, a document, an internal saved link, or an external link.
Add a hyperlink or edit a hyperlink within a page. Hyperlink may be to a page in the website, a document, an internal saved link, or an external link.
- Select text you wish to be linked or select text that is linked. Then choose Insert/Edit Link to open a dialog box.
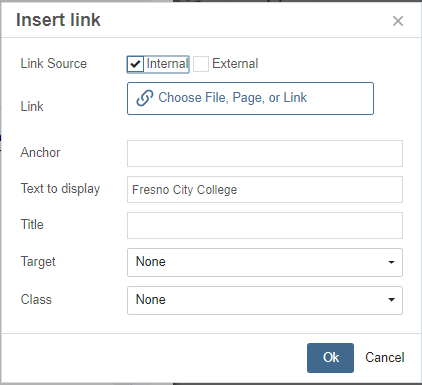
- Link Source (Internal) Choose File, Page, or Link: The system is set to help you find pages, files, and stored links in the website to which to link.
- File: By using the internal system, if the file is ever moved or updated, the link to the file will be updated and a broken link will not occur.
- Page: By using the internal system, if the page is ever moved or updated, the link to the page will be updated and a broken link will not occur.
- Link: By using the internal system, if a link is updated, the link on the page will be updated. If a link such as to WebAdvisor is updated, all WebAdvisor links on the site will be automatically updated. Plus, you do not need to know the link url address, it is in the system. For many of our systems, there is code attached to links to send the user to the correct location for a specific campus.
Using the Internal System is important. It keeps broken links from occurring and makes updating automated across the entire website.
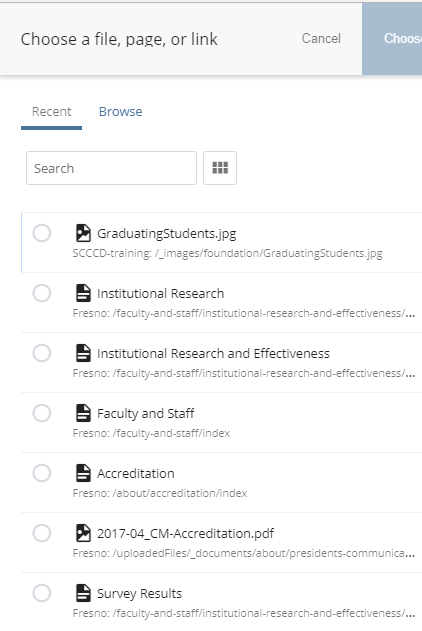
Recent items will show.
If you did not recently access the item, select “Browse”. Then you can browse through the folders for the item you want.
If you know the name of the item, type it in the search.
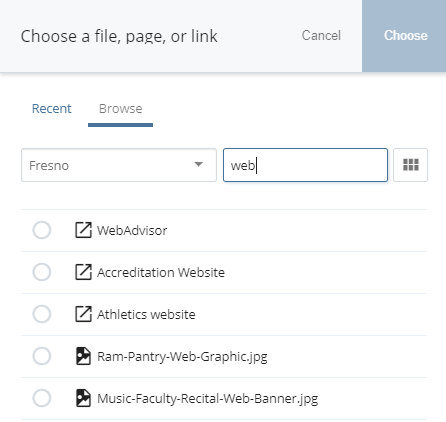
Notice how the WebAdvisor link shows when typing “web” in the search bar after selecting browse. You can tell a link from a page or file by the icon to the left of the name.
Link Source (External): Manually enter the URL link to an external website. Use external if the link is to an external site that will only be mentioned from your page. If the link will be used multiple times across the campus, contact the webmaster to have the link added to the internal link list if it is not already available.
- Anchor: if you are creating a link to take you to another section of the same page, use anchor. Before it will work, and anchor that will be linked to must be created within the page.
- Text to display: text that will show as the link. Do not use words such as “click me”, “for more information”, "read more" or “link”. Instead use the title of where the link will take you. Imagine the link alone on a page with no context. Provide enough meaning that the link is clearly understood.
- Example: WebAdvisor for the webadvisor link.
- Title: provides additional information about the link that the user should know before following the link.
- Example title: Register for classes using WebAdvisor
- Target: none or new window. If the link goes to a location not on the website, use new window. If the link goes to a location within the website, use none. If it opens a pdf document, use new window. The idea is to make maneuvering on the website as easy as possible and to keep the user on our website. So don’t close out our site but also don’t torment the user with multiple windows of our site.
- New window: other website, pdf document
- None: another page on main website
- Class: Ignore. None of the classes at this time impact links. Note: all pdfs will automatically have a pdf image attached to the link.
Remove Link
![]() Cancels link of selected text. Click on existing link first.
Cancels link of selected text. Click on existing link first.
Anchor
![]() Create anchor in location that you plan to link to within same page. (See link information). Then create a link that takes you to the anchor. Good for creating a "Table of Contents" at the top of a page.
Create anchor in location that you plan to link to within same page. (See link information). Then create a link that takes you to the anchor. Good for creating a "Table of Contents" at the top of a page.
Media
Insert / Edit Image
![]() Insert image into page. Opens dialog box.
Insert image into page. Opens dialog box.
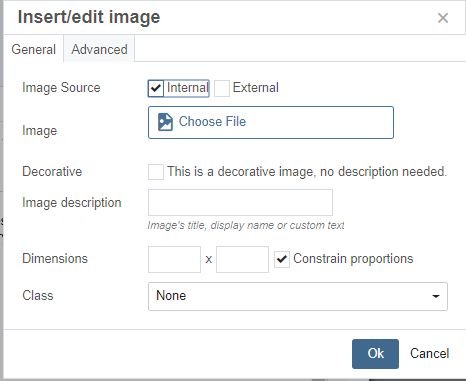
- Image Source: internal lets you choose already uploaded image. External selects image from url.
- Image: Use file chooser to find image on website.
- Decorative: if image is only for background and adds no meaning to page, then check this box. However, if the image has no meaning for the page, it probably should not be added.
- Image Description: this is required for accessibility. You must add a description of the image that explains what the image is sharing. Keep description accurate and succinct.
- Dimensions: if the image must be kept smaller than the uploaded image is naturally, define one of the dimensions (width or height). Keep constrain proportions checked and the system will automatically define the second dimension. Do not adjust image manually – it will cause the image to be distorted.
- Class: select img-responsive so that the image will display properly on all devices. If you want more than one class applied, use the formats option of the WYSIWYG.
Advanced Tab
- Figure/Caption: Displays the description beneath the image.
- Style: Do not use this option. Allows you to manually enter CSS for the image.
- Vertical or Horizontal space: Do not use this option. Allows you to set space between image and text. Site CSS has a default setting.
- Border: adjust thickness of image’s border.
Insert / Edit Media
![]() Allows you to insert video. Opens up a dialog box.
Allows you to insert video. Opens up a dialog box.
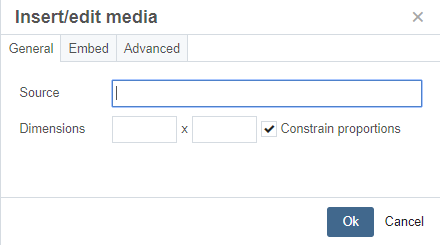
Source: URL (link) of video from outside source.
Dimensions: Once source is entered, often dimensions will be automatically set. You may adjust one dimension. Keep constrain proportions checked to ensure no distortion of video occurs.
Embed: if you have embed code <iframe src…> code, paste it here instead of link.
Advanced: If you are providing more than one format of the video (used mainly for videos uploaded to our own servers), enter link here.
Poster: if you have a poster (initial image) for the video, post link to poster here.
Note: all embedded videos must have Closed Captioning! If no captioning exists, then you may link to the video, but you cannot embed it. When adding a video, please make note of it in workflow comments. I need to make modifications so it is responsive.


